
From this…

…to this!
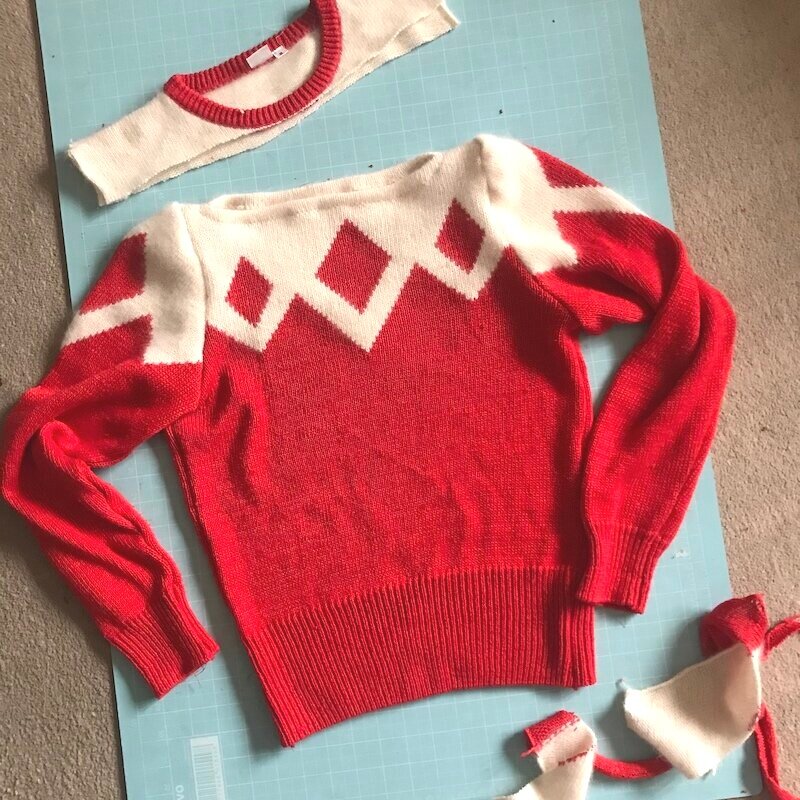
I knew as soon as I spotted this sweater in a Finnish thrift store it would be a prime refashion candidate - I loved that contrast yoke with the diamonds, but the oversize 80s styling and big sleeves had to go! Refashioning knitwear is a bit trial and error, but luckily it’s fairly forgiving thanks to the stretch in the knit.
My first step was to remove all the tiny pink faux-pearl beads that dotted the yoke. With that done, I unpicked all the seams (I didn’t bother with the shoulder seams since I was going to cut down the top), leaving me with the component parts.
The next part required a bit of planning because I wanted to ensure that the yoke portion of the bodice and sleeves aligned. I used the sleeve from a vintage pattern as a reference template, tapering into the existing wrist band.


Then I reassembled the bodice. The shoulder seams are about 1.5” long, then I just turned in the neckline seam allowance and stitched around it (I didn’t dip the front neckline lower as I did in a previous 1940s sweater refashion; both front and back are just straight across). Lastly I reattached the sleeves, lining up the yoke as best I could (although the zig zag isn’t a perfect match, the colour blocking is roughly aligned) and easing in the sleeve cap.

Notes
I use a shallow zig zag stitch to sew knits (I don’t have an overlocker or any special equipment) - this allows the seams to stretch with the knit, and reduces the risk of threads breaking.
I also get a lot of queries from people worried about knits unravelling; I was worried about it when I first tried one of these, but I haven’t found it to be an issue. In this one I used a zigzag machine stitch along the cut edges to finish them, but I didn’t even do this for my first couple of refashion projects and they’re still going strong many wears later!